Using Scinap
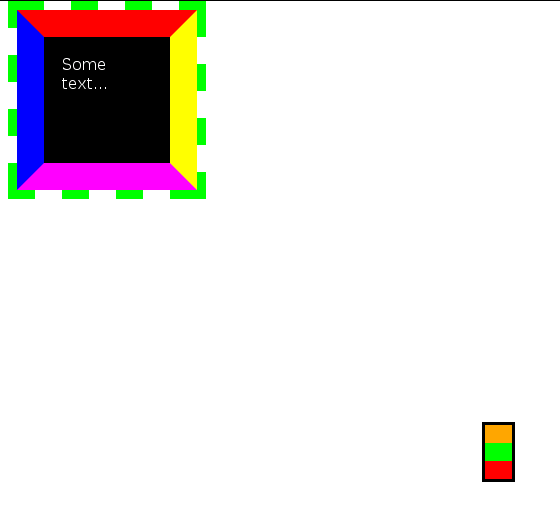
In this document, we will learn how to use Scinap, by seeing how to modify a simple web page. This is a screenshot of the web page.

This, in essence, is the HTML code for that page:
This is the CSS for the colour-box class:
And this is the stylesheet which defines the colours.
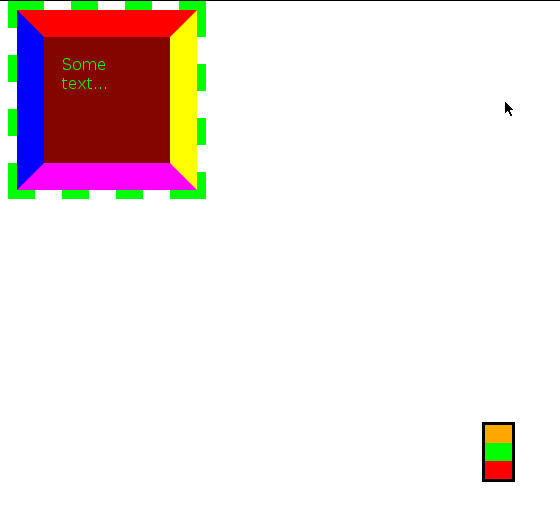
When Scinap has been loaded, we get a page that looks like this.
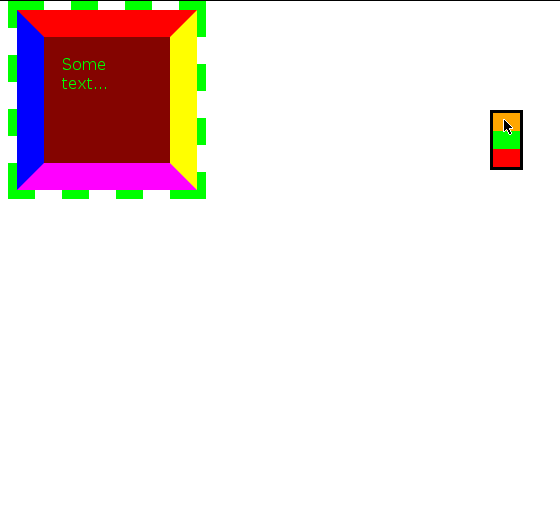
In the lower right, you see a rectangular control containing 3 coloured rectangles. This control is called the initiator. We will ignore the orange and red rectangles for now, and click on the green one.

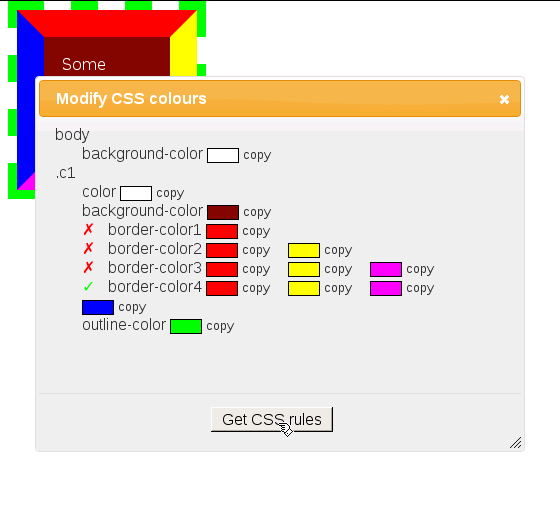
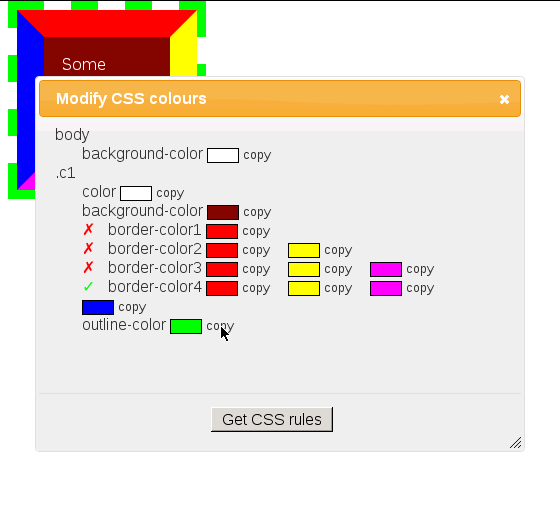
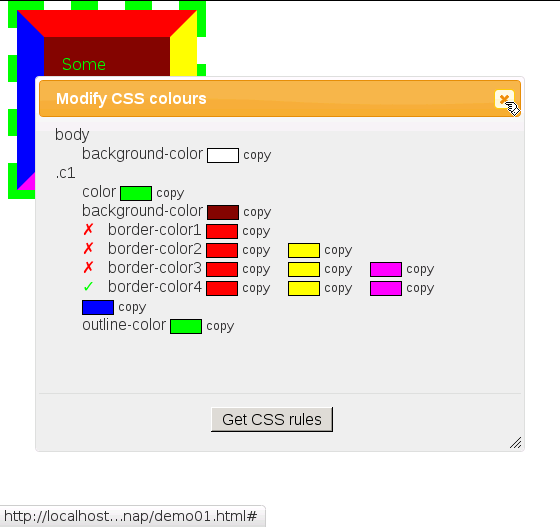
We get a representation of our colour stylesheet. The initiator is unnecessary at this stage, so it disappears.
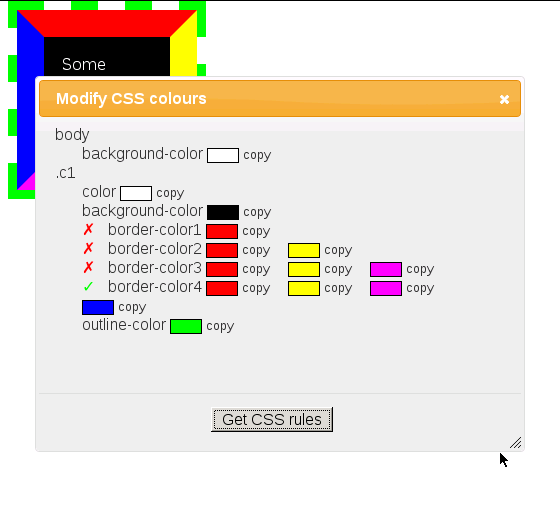
Above you see four unfamiliar border colour properties; these will be explained later.
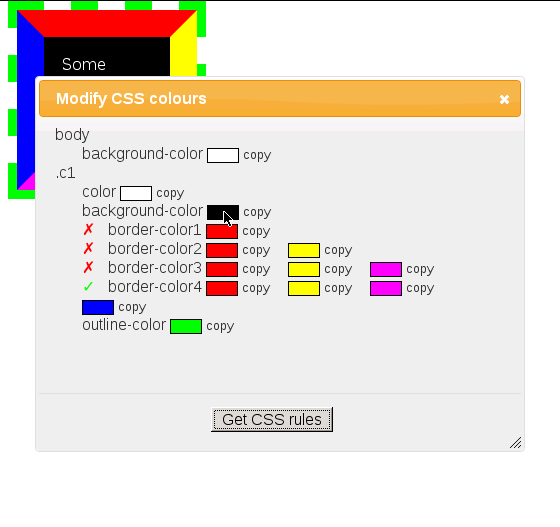
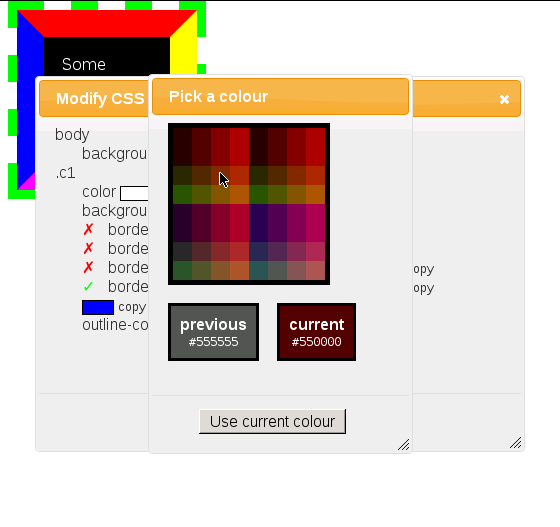
Suppose we decide to change the background colour for c1 to a dull brown. To do so, we click on the appropriate coloured patch.
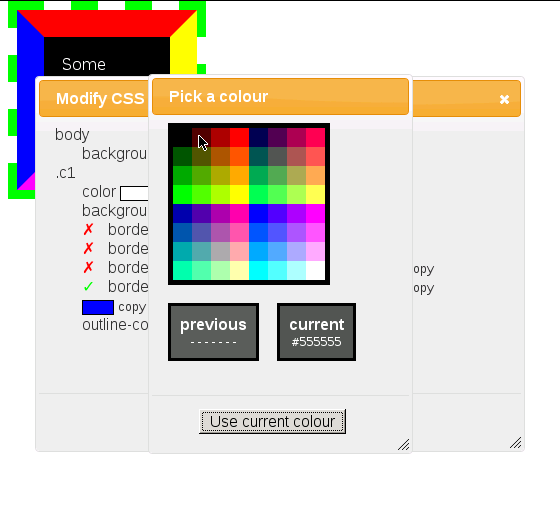
A colour picker appears, containing 64 squares, each having a distinct colour. We choose the one which most closely resembles a dull brown, and click on it.
We do the same again.
And again.
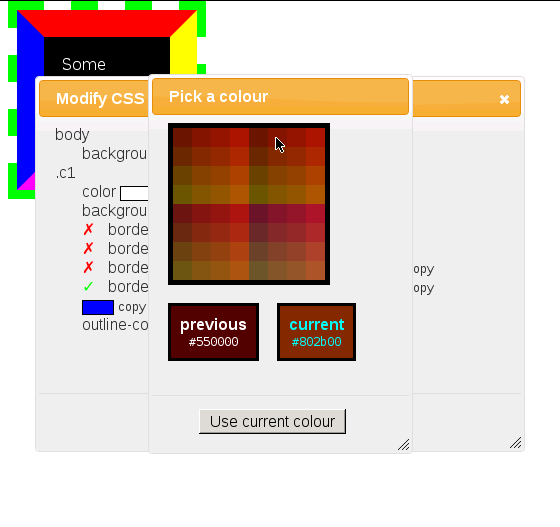
At each step, the diversity of colours decreased; we lost range but gained precision.
We continue until we have the colour we want, at which point we click "Use current colour".
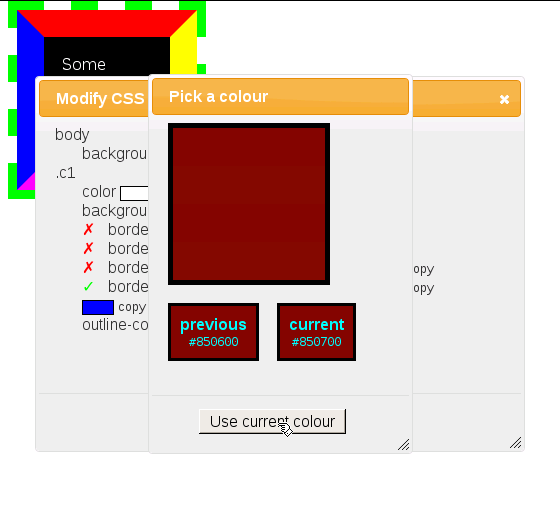
The colour changes at once, both in the dialog box and on the page itself.
You might find that the dialog box obscures the part of the page whose colour you're changing. In such a case, you can move it using the orange titlebar (just as you would move a standard window in Microsoft Windows), and you can resize it by dragging on the borders, or (easier) by dragging on the bottom right corner. These actions can be applied to all the dialog boxes created by Scinap.
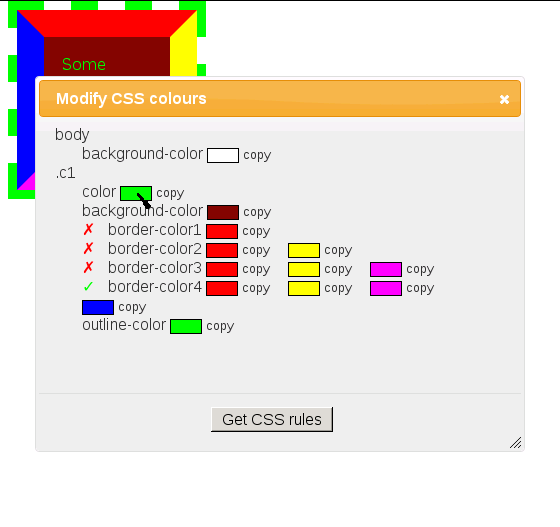
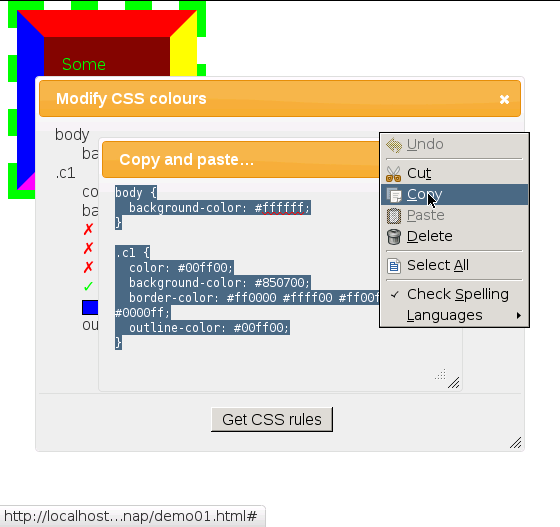
Suppose we want to reuse a colour already chosen. To enable this, the application provides a "clipboard", one which is purely internal, and independent of the system clipboard. For example, suppose we want to copy the outline colour to the text colour. To do so, we click on the appropriate occurrence of "copy".
The mouse pointer changes to a dropper (except in IE), to show that the clipboard is non-empty. (Your browser may not show the change until you move the pointer.) (By the way, the dropper isn't really that ugly; it just looks that way here because of the software I used to take the screenshots.)

To complete the copy, we move the pointer over the coloured patch for ‘color’ and click.

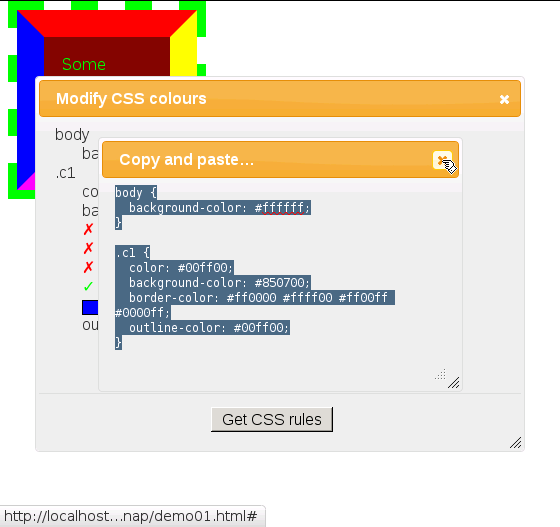
The color is changed immediately.
To empty the clipboard, click on anything but one of the coloured patches…

…whereupon the cursor immediately returns to normal.

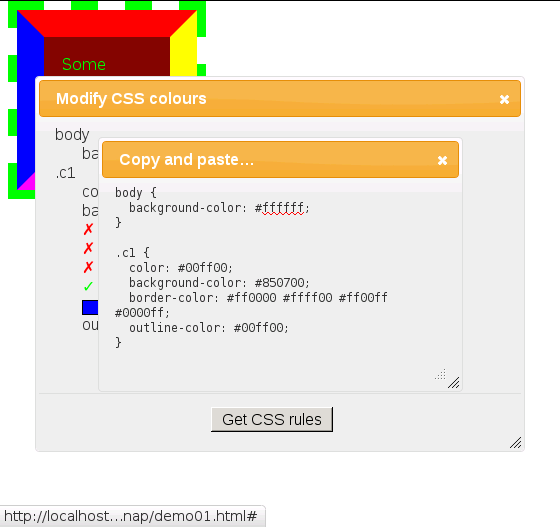
Eventually we will have colours that satisfy us, and we will want them in the form of a CSS stylesheet. This is where things get slightly hackish.
If we click on "Get CSS rules", then a stylesheet will appear.
We do "Select All"…
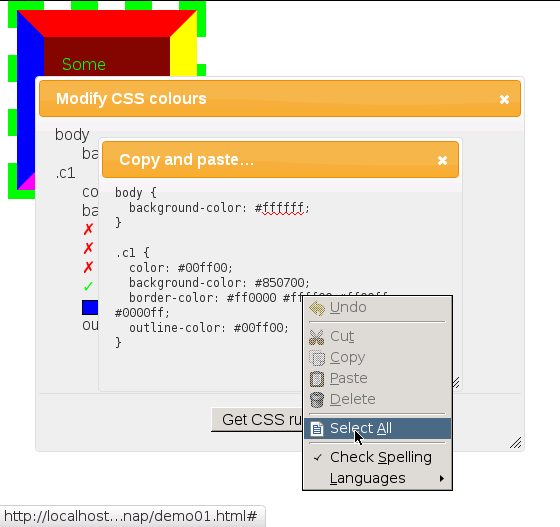
I have been unable to get this to work in Chromium, so it probably won't work in Chrome either. Instead of "Select All" and then "Copy", try typing Control-A; I have found that this works with Chromium on Linux.
Once we have the stylesheet we want, we can get rid of the dialog boxes. To do so, we click on the close box for the stylesheet…
The initiator has two features we haven't seen yet. We can move it by dragging and dropping the orange rectangle.
To terminate Scinap, we simply click on the red rectangle.

There is a boolean configuration option, restore_colors, whose value is checked at termination time. See its documentation for more information.
Terminating Scinap is not required, of course; nothing bad will happen if you leave the initiator on the page.
Border colours
Scinap is sometimes unable to perfectly reconstruct your colour stylesheet, because it cannot always determine which combination of the following properties was used:
For example, it can't tell this:
In such a case, it displays four imaginary properties called border-color1, border-color2, border-color3, and border-color4.
border-color1 represents that variant of border-color which has one component value, border-color2 represents the variant which has two component values, and so on. You can change any of these properties; if you do, the other properties will change appropriately.
When displayed, each of the four properties is preceded by a green check mark (✓) or a red X (✗). You can probably see why, or figure it out with a little experimentation, but here is the explanation anyway.
A red X means that the property is incapable of representing the current state of the border colours. Instead, it displays the best approximation possible.
You can still manipulate one of these inaccurate properties; if you change any colour on an inaccurate property, then that property immediately becomes authoritative for all the border colours, and the appropriate updates are made to all the other border properties.
A green check mark means the opposite. It's easy to see that border-color4 must always be preceded by a green check mark.